
Are you tired of hiding your smile due to missing teeth? Perhaps you are dealing with the daily frustration of loose, uncomfortable dentures that make chewing your favorite foods an absolute chore. If so, you are likely exploring the world of modern restorative dentistry. At the heart of permanent tooth replacement is the implant procedure, a transformative journey that rebuilds your smile from the root up.
Understanding the steps involved in an implant procedure can alleviate anxiety and help you make an informed decision about your oral health. This comprehensive guide will walk you through every phase of the journey, ensuring you know exactly what to expect before, during, and after you take your seat in the dentist’s chair.
Understanding the Basics: What is a Dental Implant?
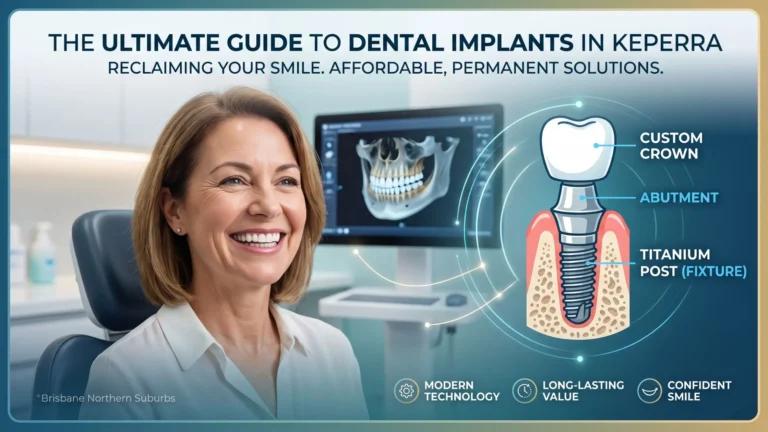
Before diving into the surgical steps, it is essential to define what we are talking about. When we refer to an implant dental solution, we are discussing a three-part system designed to mimic the natural structure of a human tooth perfectly.
- The Fixture (The Implant): This is a small, bio-compatible titanium post that is surgically inserted into your jawbone. It acts as an artificial tooth root.
- The Abutment: A small connector piece that attaches to the top of the titanium post once it has healed.
- The implant crown: The visible, custom-crafted prosthetic tooth that sits above the gum line, restoring your smile’s aesthetics and function.
Unlike traditional dentures that sit on top of the gums, or traditional bridges that rely on adjacent teeth for support, this multi-layered approach preserves your jawbone and provides unparalleled stability.
Step 1: The Initial Consultation and Diagnostics
Your journey begins long before any surgery takes place. The very first step is finding an experienced professional. Searching for a highly-rated implant dentist near me is crucial, as the success of your restoration depends heavily on the skill and planning of the clinician.
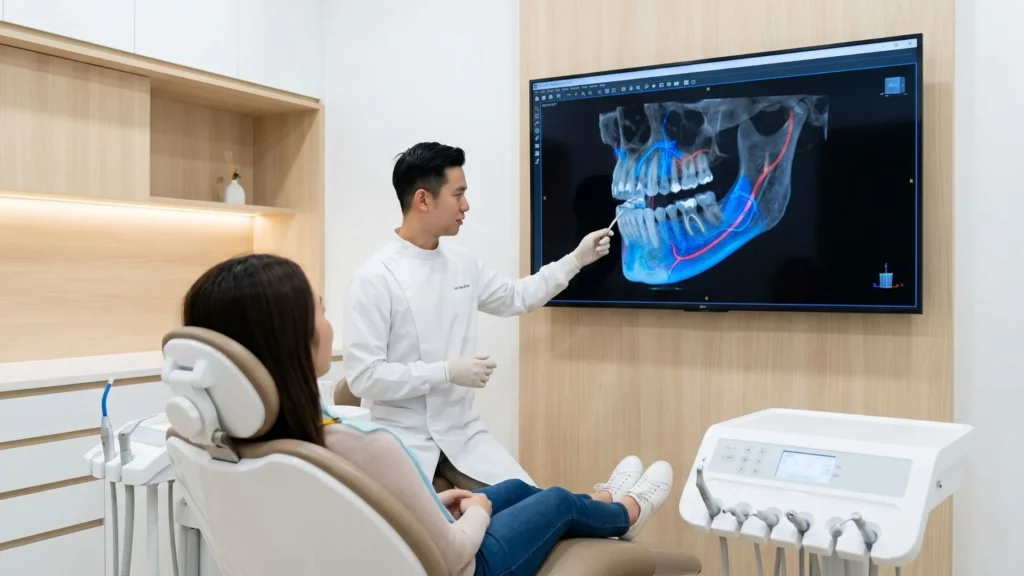
During your initial consultation, your dentist will conduct a thorough examination of your mouth. This involves:
- Comprehensive Oral Exam: Checking for any signs of active gum disease or decay in remaining teeth. These issues must be treated before moving forward.
- 3D CBCT Scans: Traditional 2D X-rays are not enough. A 3D Cone Beam Computed Tomography (CBCT) scan provides a highly detailed, three-dimensional view of your jawbone, nerve pathways, and sinus cavities. This allows your dentist to measure the exact volume and density of your bone.
- Medical History Review: Your dentist will review your overall health, including any medications you take or conditions like diabetes that might affect the healing process.
Once the diagnostics are complete, your dentist will formulate a customized treatment plan. During this phase, you will also receive a detailed breakdown of the implants teeth cost, ensuring full financial transparency before you commit to the treatment.
Step 2: Preparatory Procedures (If Necessary)
Not every patient is immediately ready for the implant procedure. If your tooth has been missing for a long time, or if you suffered from severe periodontal disease, your jawbone may have deteriorated. The titanium post requires a strong, dense foundation of bone to anchor successfully.
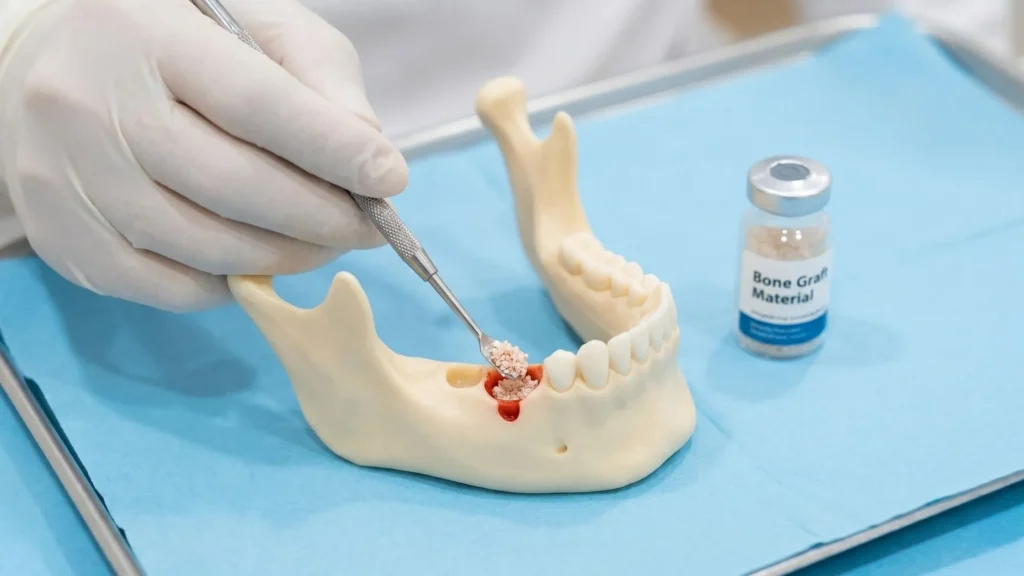
If your 3D scans reveal insufficient bone volume, your dentist will recommend an implant bone graft. This involves taking bone grafting material (either synthetic, from a donor, or from elsewhere in your body) and packing it into the area where the implant will be placed. The body then uses this material as a scaffold to grow new, strong bone.
Note: If you require a bone graft, this will add several months to your overall timeline, as the graft must heal and integrate before the titanium post can be safely placed.
Step 3: The Surgical Placement of the Implant
nce your jawbone is deemed healthy and dense enough, the core phase of the implant procedure begins. Here is what happens on the day of surgery:
Anesthesia and Comfort
Your comfort is the top priority. The procedure is typically performed under local anesthesia, meaning the area will be completely numb, and you will feel no pain—only slight pressure. For patients with high dental anxiety, conscious sedation options may be offered by your chosen implant dentist near me.
Incision and Placement
- Accessing the Bone: The dentist makes a small, precise incision in your gum tissue to expose the underlying jawbone.
- Creating the Channel: Using a series of specialized, highly precise drills, the dentist creates a narrow channel in the bone. The speed and temperature of the drills are carefully controlled to prevent any damage to the surrounding bone cells.
- Inserting the Post: The titanium post is then carefully threaded into this channel. It is torqued to a specific tightness to ensure immediate initial stability.
- Closing the Gums: Finally, the gum tissue is stitched back over or around the implant site to protect it while it heals.
Despite sounding intensive, this actual surgical phase is often relatively quick, sometimes taking less than an hour for a single tooth replacement.
Step 4: The Critical Phase of Osseointegration
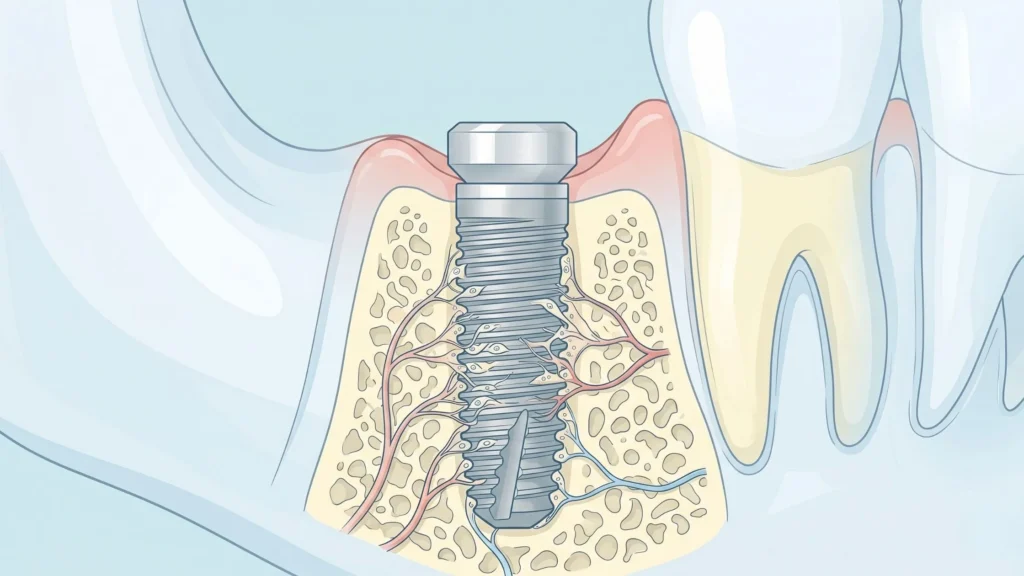
After the surgery, patience becomes your greatest ally. You will enter a healing phase known as osseointegration. This is a biological process where your natural jawbone grows around and permanently fuses with the microscopic ridges of the titanium post.
Osseointegration is what gives an implant dental restoration its legendary strength. This process cannot be rushed. It typically takes anywhere from three to six months, depending on your body’s natural healing capabilities and whether the implant was placed in the upper or lower jaw (the lower jaw bone is generally denser and fuses faster).
During this time, you will usually wear a temporary, removable tooth so you do not have to walk around with a visible gap in your smile. If you ever experience sudden pain or a damaged restoration during this healing phase, it is vital to contact a clinic offering emergency dental treatment immediately to protect your surgical site.
Step 5: Attaching the Abutment
Once your dentist has confirmed through X-rays that osseointegration is complete and the titanium post is solidly locked into your jawbone, it is time for the next step.
If the gum tissue was closed over the implant during the initial surgery, a minor secondary procedure is performed. A small incision is made in the gum to expose the top of the post. The dentist then attaches the abutment—the critical connector piece.
After the abutment is placed, your gums will need about two weeks to heal and shape themselves naturally around this new component. This ensures that when the final tooth is placed, the gumline looks perfectly natural, just like it does around your biological teeth.
Step 6: Crafting and Placing the Final Crown
The final step of the implant procedure is arguably the most exciting. Once your gums have healed around the abutment, your dentist will take highly accurate digital impressions (or traditional molds) of your mouth.
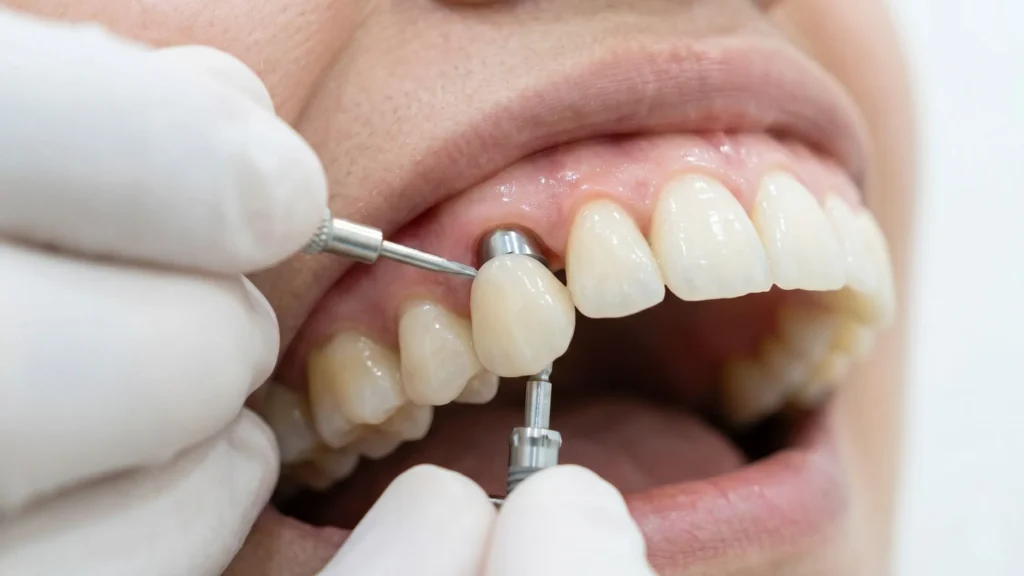
These impressions are sent to a specialized dental laboratory, where master technicians craft your custom implant crown. This is not a one-size-fits-all piece of plastic. High-quality crowns are usually milled from advanced ceramics or zirconia. The technicians will meticulously color-match the crown to blend seamlessly with the specific shade, translucency, and anatomy of your surrounding natural teeth.
When the crown is ready, you will return to your dentist’s office. The dentist will check the fit, the bite alignment, and the aesthetics. Once everything is perfect, the crown is permanently attached to the abutment, either cemented or screwed securely into place.
The Timeline at a Glance
To summarize, here is a quick look at the typical timeline:
| Treatment Phase | Estimated Duration | What Happens |
| Consultation & Planning | 1 – 2 weeks | 3D scans, treatment planning, cost breakdown. |
| Preparatory Work (If needed) | 3 – 6 months | Extractions or bone grafting to build a foundation. |
| Surgical Placement | 1 day | The titanium post is inserted into the jawbone. |
| Osseointegration | 3 – 6 months | The bone fuses with the titanium post. |
| Abutment Placement | 2 weeks | Connector is placed; gums heal around it. |
| Final Crown Placement | 2 – 3 weeks | The custom-made tooth is fabricated and attached. |
Understanding the Financial Investment
It is no secret that this level of advanced restorative dentistry requires an investment. When researching the implants teeth cost, it is vital to understand that you are not simply buying a product; you are paying for a complex medical procedure, state-of-the-art biocompatible materials, and the specialized expertise of your clinical team.
While the upfront cost is higher than traditional dentures or bridges, the long-term value is unmatched. A well-cared-for implant can last a lifetime, whereas traditional bridges typically need replacing every 7 to 15 years, and dentures require frequent relining and eventual replacement. Over a 20-year period, the cost of replacing inferior solutions often surpasses the one-time investment of a permanent implant.
Aftercare: Protecting Your New Smile
Congratulations! You have completed the implant procedure. However, the journey does not end the moment you leave the clinic with your new smile. Proper aftercare is essential to ensure your restoration lasts a lifetime.
While the titanium post and ceramic crown cannot develop cavities, the surrounding gum tissue is still vulnerable to periodontal disease. A condition known as peri-implantitis (inflammation and infection around the implant) is the leading cause of late-stage failure.
To protect your investment:
- Brush Twice Daily: Use a soft-bristled toothbrush and non-abrasive toothpaste.
- Floss Religiously: Use implant-specific floss or a water flosser to clean around the abutment and beneath the crown.
- Keep Your Appointments: Visit your dentist every six months for professional cleanings and examinations. They will take X-rays to monitor the bone levels around your implant.
- Avoid Bad Habits: Do not use your teeth as tools to open packages, and if you grind your teeth at night, ask your dentist for a custom night guard to protect the ceramic crown from excessive force.
Conclusion
The implant procedure is a remarkable triumph of modern dental engineering. By systematically rebuilding the tooth from the root to the crown, it offers a solution that looks, feels, and functions just like nature intended. If you are ready to reclaim your confidence, your ability to eat without restriction, and your vibrant smile, start by booking a consultation with a qualified professional today. The journey takes time, but the lifetime of confident smiles waiting at the finish line is well worth the wait.